Using the Contacts App
The contacts app of ownCloud is like any other mobile contact app but with more functionality. Just as you open your account you will get the a default addressbook available. We will see later that Of course you can always add and remove addressbooks in here.
Adding contacts
There are two ways in which you can add contacts
- Add them manually
- Import a VCF file
Importing
So first we’ll check out how to import all the VCF files as they are a lot more faster way of creating contacts. Just below the contact list, click on the gear button:

Contact settings icon
Once you’ve clicked it, an up arrow button which lets you upload files will be shown:
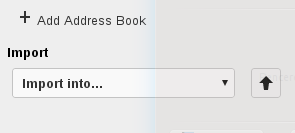
Contact file upload icon
After choosing an addressbook to import into, click on the arrow. The upload window will be opened and let you choose your files. You can upload the files one by one or upload all of them at one go.
Let us demonstrate. Open the directory in which you store all the files and then do the following Keep pressing CTRL and select the files to upload. After you are done just click on the open button After the upload it should look something like this in which all the names and contacts will be sorted alphabetically
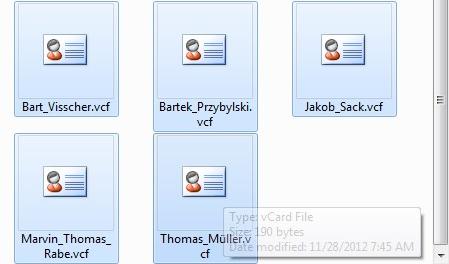
Picking VCF files
After upload, the interface will automatically place your contacts into ownCloud.
Create contacts manually
On the left side of contacts app, you could see the new contact button (first one). Click on it. You can now see an empty contact in the main part of the interface. You have the ability to add all your informations about the contact: the name, the address, the e-mail, the telephone nr, etc.
Just click on a field and start typing the information. You can use the “Add Field” button to add another types of information for this contact.
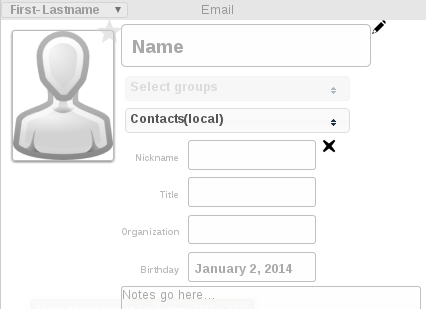
Empty contact view
When you want to remove an information of your contact, just click on little delete icon at the right of the field you want to remove.
Adding picture to the contact
There are two methods in which you can give a picture id to the specific contact
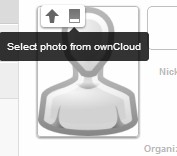
Contact picture options
- Direct upload
- Select pics already uploaded in ownCloud files.
After you have selected the picture for the contact you get an option to crop the picture to suit your requirements
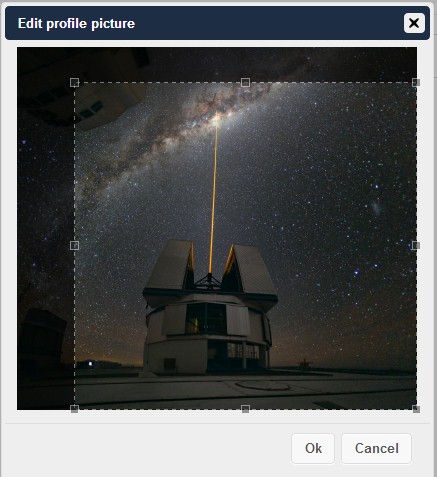
Cropping contact picture
You can crop the picture however you wish and then press OK.
As you can see it is really easy to set things right in this app. It automatically picks up the First name, Middle name (if any) and the last name You may add or delete any section you want for your own convenience.
Creating new addressbooks
When you click on settings button on bottom bar, you will have access to the application’s settings. Then, you will be shown all available addressbooks to access the options.
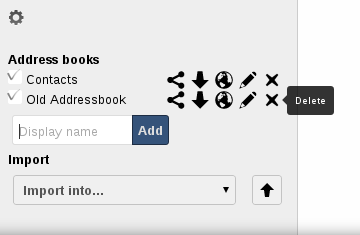
Addressbook options
There, you have the ability to add, delete, download or share your addressbooks. Hover your cursor on every icon to see what they mean.
Keeping your addressbook in sync
One of the most important thing in any contact app is to keep it in Sync. You can sync this contact app to your phone which has the following OS’s- Android and iOS
Syncing with Android
- Install CardDAV- Sync free from Google play store by visiting this link.
- This app supports auto- configuration which is a Boon- after installing visit this link - carddavs://example.org/remote.php/carddav/ to auto-configure the app.
- Enter your login details
- After the app has checked your login details you may just select- Sync server to phone option
- That’s it there is nothing else to do for Android :)

Syncing your iOS device
Synchronizing the Address book
- Open the settings application.
- Select Mail, Contacts, Calendars.
- Select Add Account.
- Select other as account type.
- Select Add CardDAV account.
- For server, type http://example.org/remote.php/carddav/principals/username
- Enter your user name and password.
- Select Next.
- If your server does not support SSL, a warning will be displayed. Select Continue.
- If the iPhone is unable to verify the account information perform the following:
- Select OK.
- Select advanced settings.
- Make sure Use SSL is set to OFF.
- Change port to 80.
- Go back to account information and hit Save.
Now should now find your contacts in the address book of your iPhone.
It doesn’t work!!!
Are you having problems using the app? Have a look at the Troubleshooting guide.